There are two common use cases that we want to configure additional authentication servers on the Pulse Secure appliance. Contractors and vendors need to access certain network resources on. Your company security policies do not allow admins to create AD accounts for vendors. During a company merger, while migrating user accounts into its parent company, there are period of time that users need to access VPN and authenticate to the legacy active directory. In this session, we’ll explain how to work with the Pulse Secure Juniper SSL VPN and setup additional authentication servers.

Pulse Secure Juniper SSL VPN Setup Additional Authentication Servers
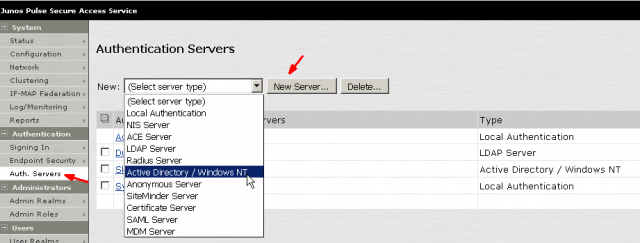
Create a New Authenticate Server
Login the Junos Pulse Secure Access Device, click on Auth. Server under Authentication session, select the authentication server type you like to add and click on New Server. In this example, we are adding an AD (Active Directory) server for user / group authentications.
Configure the required fields. If the Domain Controller is a Windows 2008 server, you need to check the box. Otherwise leave everything else the default.
Please note that the user account inserted here must have Domain Admin privileges. Since it is a system to system communication and it has no human interactions like typing in the password each every time, it is a good practice creating a domain service account with its password never expires.
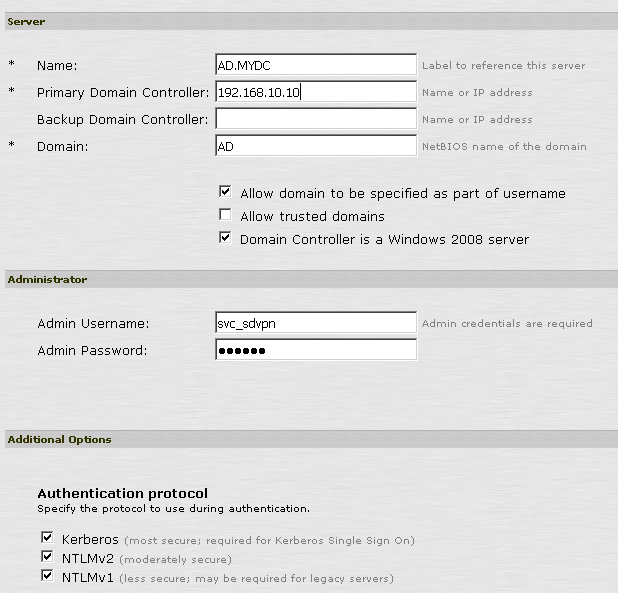
Always “Test Configuration” and make sure the Pulse Secure box can talk to the Domain Controller before saving the settings.
Create a New User Authentication Realm
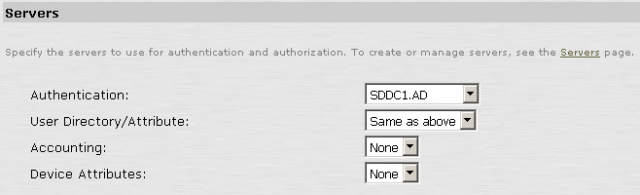
Go to Users – User Realms – New User Realm. And configure the appropriate settings here. One of the easiest ways I found was to “duplicate” your existing User Realm. Then change the Authentication Servers to point to the newly created server.
Keep in mind that the Group role mapping will be broken unless the new AD contains the exact Groups and structure. What I did was that I deleted all the role mappings in the new User Authentication Realm and created them manually. It should be a fairly straightforward process if you knew what Groups to assign what kind of access.
Add the new Authentication Realm into the Existing Signing In page
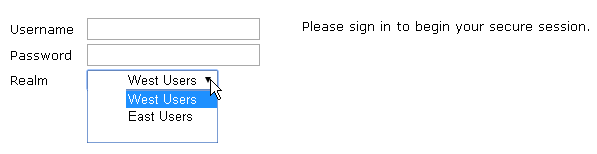
You can create a separate Sign In page with its own logos and looks. In this example I applied the new User Authentication option in to our existing user sign in page. The new authentication realm is going to be in a pull-down option for users to select prior logging in.
Go to Signing In – Sign-in Policies and select the “*/” policy under User URLs.
![]()
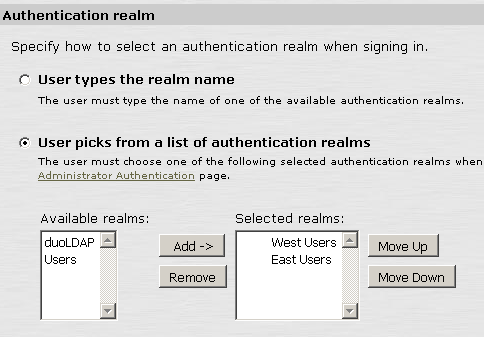
Select User picks from a list of authentication realms and add the new User Authentication Realm just created. By doing this configuration, users will be provided with options which user realm or group they belong to and sign in with.
Save the configuration and you are now ready to test.
Common Issues and Troubleshooting
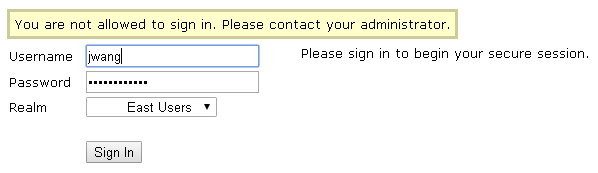
I have seen this error message quite often when first trying to authenticate to the new active directory. The issue is that you have not likely configured a Role Mapping rule.
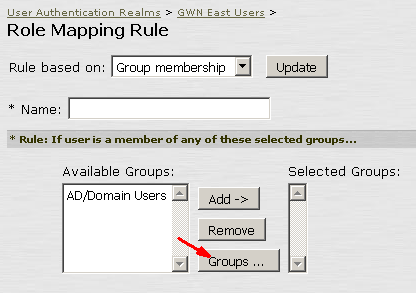
Log back in to the admin console. Select the new User Authentication Realm and go to Role Mapping. If you find here empty, you need to create at least one rule to make it work. For demonstration purpose, we’ll allow all domain users to access the VPN. You can learn from this example and map groups with roles in a more granular manner.
Click on New Rule and select “Group membership” in the pull down menu in Rule based on and click update. Click on Groups to search for the AD security group for the rule.
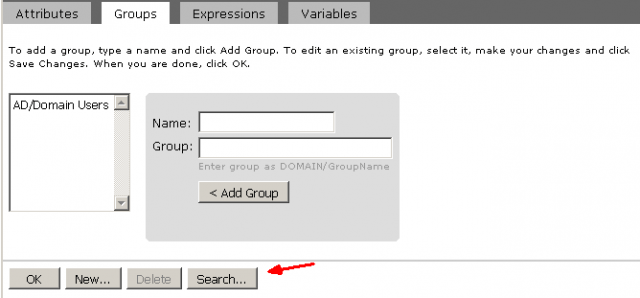
Here you may select different AD group fits your environment. If you want to cover all the Domain Users, select AD/Domain Users.
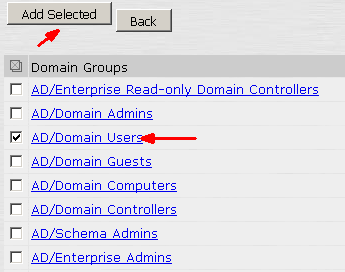
And add it to the Selected Groups and apply the appropriate Roles.
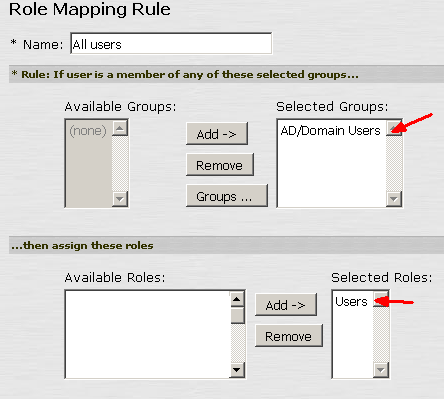
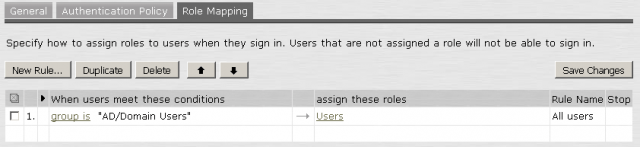
Once saved, you’ll see the rule listed.
You should be able to login now by authenticating to the new server.