You can run the Cisco VIRL lab on a workstation or laptop. There are two options – installing VIRL as a native OS, or installing VIRL as a virtual machine running on top of your existing OS. In this tutorial I’ll walk you through the steps taken to Install Cisco VIRL on VMware Workstation Pro and Player, as a virtual machine.
VMware Workstation Pro and Player are for Microsoft Windows users. For Mac users you can check out my tutorial on Cisco VIRL Installation on VMware Fusion Pro for Mac OS. Choosing between Workstation Player and. Pro version, VMware website has a comprehensive comparison chart that outlines the differences. What’s more relevant to running the VIRL server, I believe the following key features are missing in the Player version.
- Virtual Network Editor
- Run as a server to share virtual machines
- Take snapshot for backup/rollback
- Connect remotely to vSphere to manage VMs
Although you can still run VIRL using a Workstation Player for testing and trail purpose, I strongly recommend you getting the Pro version if you plan to use VIRL for long term. In this example, I used VMware Workstation Pro version 12.1.1.
System requirements:
- A minimum of 2 logical CPU cores (not physical CPU) and 4GB or memory that can be dedicated to the VIRL virtual machine. 4 logical CPUs and 8GB of memory or more is highly recommended.
- At least 80GB of free disk space.
- Intel CPUs with Intel VT-x / EPT or AMD CPUs with AMD-v/RVI extensions present and enabled in the BIOS.
- Outbound TCP ports 4505 and 4506 must be permitted on your Internet firewall to allow connections to the Cisco SALT licensing servers.
- VMware Workstation (or Pro) v8.02 or later
Install Cisco VIRL on VMware Workstation Pro and Player
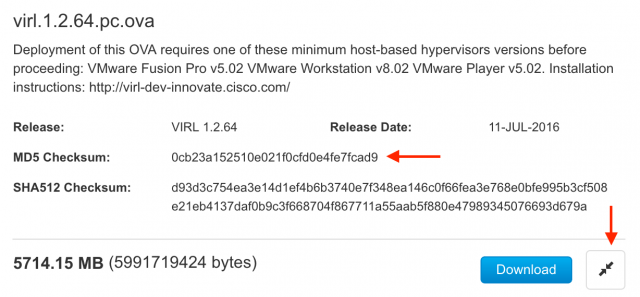
Step 1: Validate downloaded installation image
Because the installation image downloaded is large, it is possible that the file is corrupted during download. To save your time later, it is important to make sure that the downloaded file matches the original. Mac comes with the utility of checking DM5 hash sum. It should match what is provided on Cisco’s download website.
Step 2: Create four virtual networks in Workstation Pro
The VIRL virtual machine comes with 5 virtual network interfaces that are used for various purposes.
- Management: mapped to “VMnet8” / NAT by Workstation by default. It is the interface we use to access the VIRL VM over SSH for example. The mapped interface provides VIRL with an IP address, an Internet gateway and DNS servers for it to go out to the Interface for licensing and updates.
- FLAT: first Layer-2 network
- FLAT1: second Layer-2 network
- SNAT: Layer-3 / SNAT network – EXT-NET
- INT: clustering network
The first Management interface will be created by itself when boot up VIRL in VMWare Workstation Pro. We just need to create the remaining four networks.
Launch VMware Workstation Pro and navigate to “Edit > Virtual Network Editor”.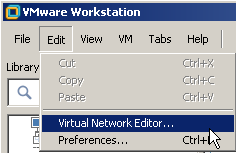
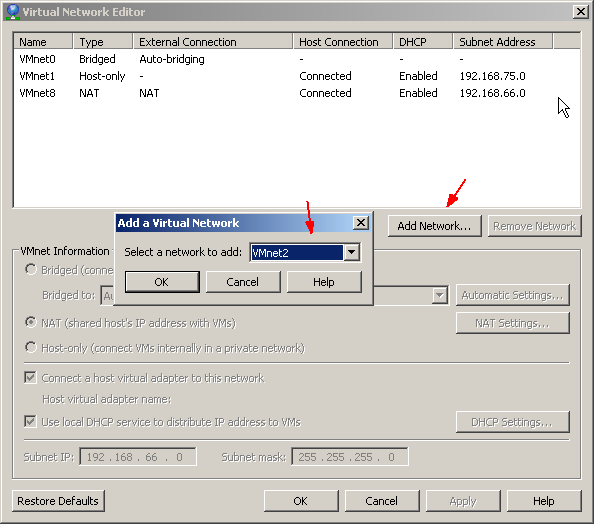
Click “Add Network” to create a new virtual network. If this is your fist time creating virtual networks in VMware Workstation, “VMnet2” will be the first one created. If you have created virtual interfaces for other software or tools in the past, it’ll use the next incremental numbers such as VMnet3 for your VIRL installation. We’ll be creating four virtual networks. Do keep a note on which ones are created for your VIRL virtual machine’s use. In our example as a fresh install, “VMnet2” through “VMnet5” will be created.
Update “VMnet2”’s configuration by removing “Use local DHCP service to distribute IP address to VMs”, enter “172.16.1.0” in “Subnet IP:” field. Click “Apply” and repeat these steps until all four virtual networks are created.
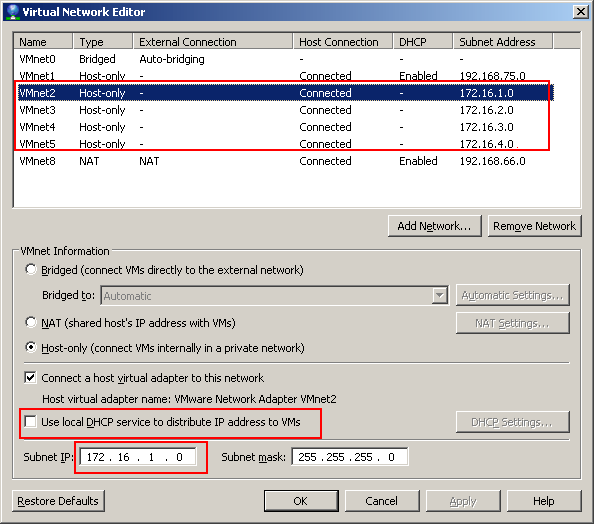
In summary, here are the virtual networks we have created in VMware Workstation Pro.
- VMnet2: 172.16.1.0 /24
- VMnet3: 172.16.2.0 /24
- VMnet4: 172.16.3.0 /24
- VMnet5: 172.16.10.0 /24
If you are using Workstation Player, creating virtual networks is not possible through GUI. There is a workaround that you can create these virtual networks in PowerShell command line.
On Windows, search for “Windows PowerShell” and launch it. Copy and paste the code below to create the virtual networks. The example below assumes “VMnet2” is the first available virtual network in the Player. Adjust to match your environment accordingly.
cd "\Program Files (x86)\VMware\VMware Player\"
./vnetlib64 -- add adapter vmnet2
./vnetlib64 -- set adapter vmnet2 addr 172.16.1.1
./vnetlib64 -- set vnet vmnet2 mask 255.255.255.0
./vnetlib64 -- update adapter vmnet2
./vnetlib64 -- add adapter vmnet3
./vnetlib64 -- set adapter vmnet3 addr 172.16.2.1
./vnetlib64 -- set vnet vmnet3 mask 255.255.255.0
./vnetlib64 -- update adapter vmnet3
./vnetlib64 -- add adapter vmnet4
./vnetlib64 -- set adapter vmnet4 addr 172.16.3.1
./vnetlib64 -- set vnet vmnet4 mask 255.255.255.0
./vnetlib64 -- update adapter vmnet4
./vnetlib64 -- add adapter vmnet5
./vnetlib64 -- set adapter vmnet5 addr 172.16.10.1
./vnetlib64 -- set vnet vmnet5 mask 255.255.255.0
./vnetlib64 -- update adapter vmnet5
Step 3: Deploy VIRL VM image (OVA) in VMware Workstation
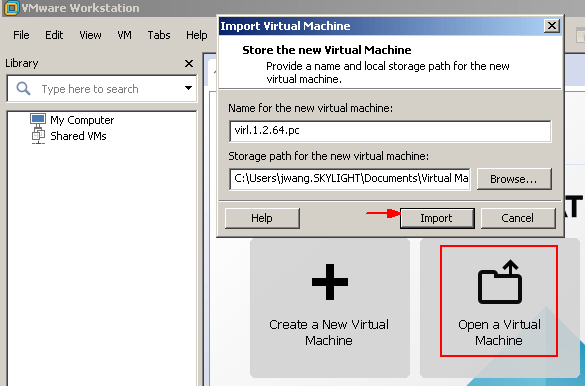
Launch VMware Workstation Pro and select “Open a Virtual Machine” from the main screen.
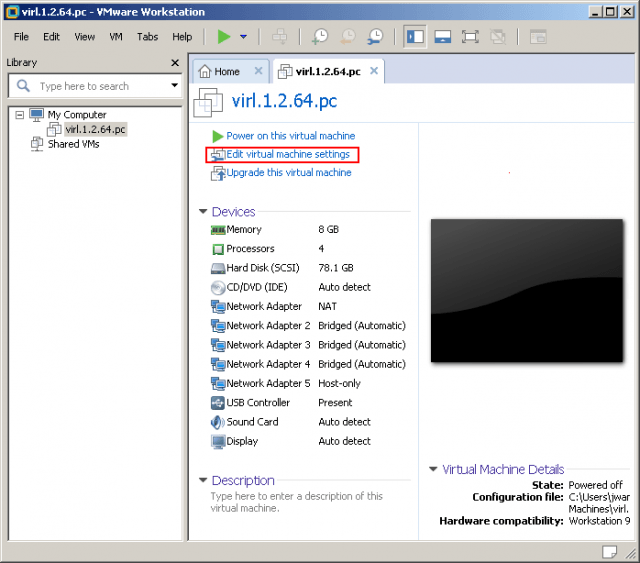
Once the virtual machine is imported, review the information and click on “Edit virtual machine settings”. Here we map the Network Adapters of VIRL server to the virtual networks (VMnet2 – VMnet5) we just created.
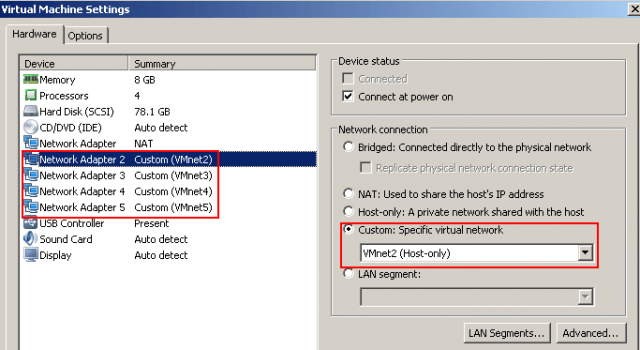
Highlight “Network Adapter 2” and select “VMnet2” in “Custom: Specific virtual network” on the right side. Repeat the same steps and assign “VMnet3” through “VMnet5” to the remaining Network Adapters. “Network Adapter” will be used for Internet and host connectivity and should not be modified.
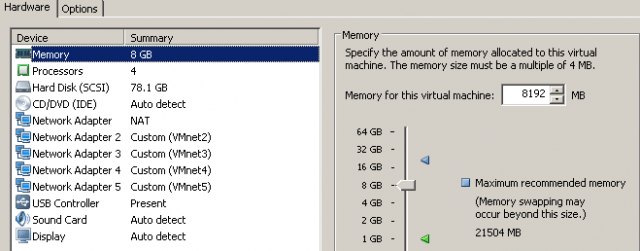
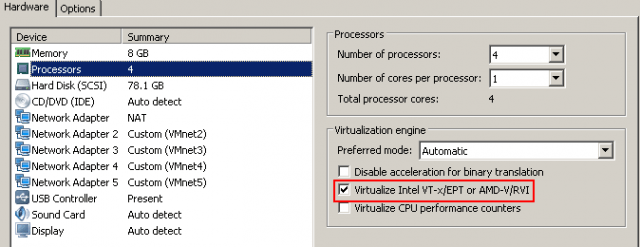
Adjust the Memory and CPU resource assigned to the VIRL virtual machine. The minimum requirement is 2 CPU and 4GB of memory. 4 CPU and 8GB of memory is recommended.
Now your VIRL virtual machine has been imported and is ready for launch.
Step 4: Launch VIRL virtual machine in VMware Workstation
We now go ahead and launch the VIRL virtual machine for the first time.
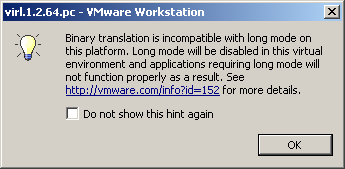
When I first try to launch the VIRL virtual machine, I received couple of error messages as below. And VIRL failed to start.
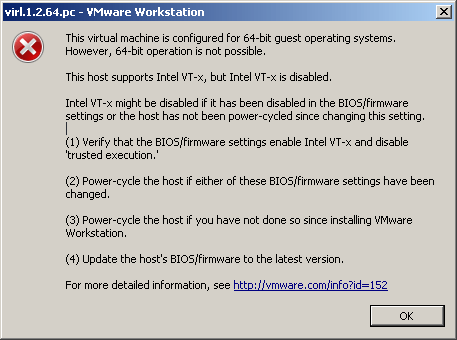
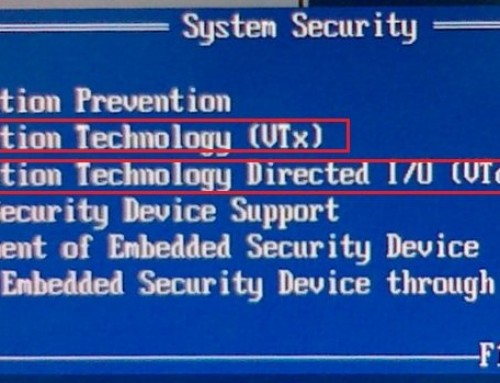
The second message was easy to understand. My computer didn’t have Intel VT-x enabled. So I rebooted my computer and went in BIOS > Virtualization Support and checked “Enable Intel Virtualization Technology”. After rebooted my computer and tried launching VIRL VM again. This time the VM started successfully.
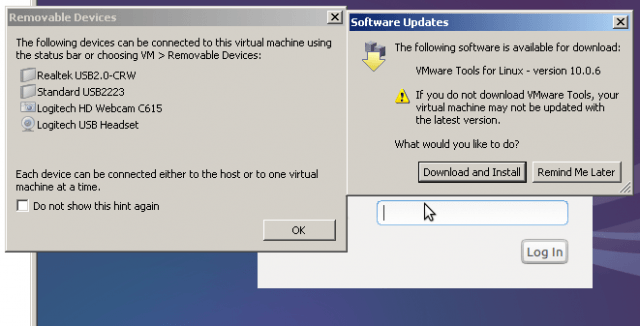
It prompted for “VMware Tools for Linux” update. It is safe to “Download and Install”. Login using default credential (case sensitive):
Username: virl
Password: VIRL
We now need to run a few tasks to make sure the VIRL server is ready for license activation.
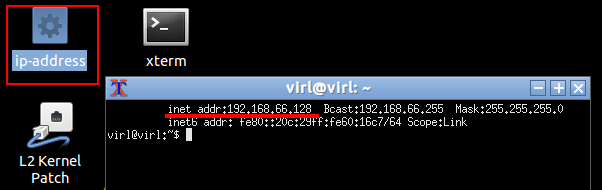
First locate the IP address of the VIRL server and SSH to it. On the desktop of VIRL console, click the icon named “ip-address” on the top left corner. In my case, the management IP of VIRL is 192.168.66.128.
Now we may SSH to the VIRL server using any SSH client such as Putty. I found it is a lot more responsive using command line in SSH than GUI.
From this step forward, follow the same process described in Cisco VIRL Installation on VMWare ESXi “ Step 5: Prepare for license activation”.
It concludes my tutorial Install Cisco VIRL on VMware Workstation Pro and Player.


This is a great guide, thank you for all of your hard work. Do you know if the free version of VM workstation will be able to run VIRL?
You can use VMWare Workstation Player. It is a free product.
Jack, I’d like to thank you for the time you spent putting this detailed configuration guide together. It has been very helpful.
Thank you for your kind words.
this help me a lot, but i still cannot open Uwm page after those setting , could you please provide some suggestion . thanks
Can you ping the management IP? If you set up VIRL in VMware, using the VMware console, could you ping the gateway and the Internet? I’d suggest you check the basic network configuration first and making sure the basic connectivity is working.